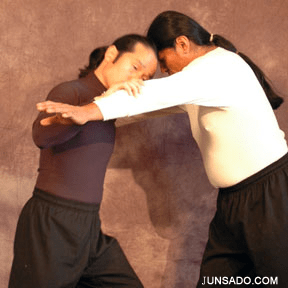
Headbutting is illegal in most sports competitions, but in a self-defense situation, when your hands are tied up or you are in a clinch, your head may be the only weapon you can use.

The head is a vulnerable target, yet a dangerous weapon in fight.
A headbutt causes visceral pain that can instantly unlock a grip, make inroads, knock out, or change the tide of a confrontation. It shocks the inside of the brain. It doesn’t discriminate on size. It can incapacitate the body. Let’s take a look at why it works, where to strike, and how to do it. This blog is adapted from ‘Vital Point Strikes: The Art and Science of Vital Target Striking for Self-defense & Combat Sports‘.
Why Headbutt
As a weapon, the head is better used for thinking than for striking, however when you have no other options, a headbutt can be a lifesaving technique. The element of surprise is critical to headbutting. Generally, the headbutt is a technique that you can use once in a fight, so if you choose to use it, make it count.
How To Headbutt
From a natural stance, tuck your chin down, clench your teeth, and stiffen the neck muscles. Aim and snap your head toward the target. For more power, use your body weight. Keep your eyes on your opponent at all times. Because of the sensitive nature of the brain, which can be damaged by repeated impact, practicing headbutting is not recommended.
CAUTION: Begin to practice finding the spots on your face with your hands by gently pressing and monitor the effects carefully. Be aware that a vital point strike can render a person unconscious, paralyze some parts of the body and even cause death. Never practice full power or full pressure strikes on a partner and always use common sense when practicing.
Major Targets
1. Cheek Bone-Orifice (ST03, the yellow dot in the photo below right); 2. Nose (GV25, the white dot); 3. Eyebrow (EX-HN4, the blue dot); 4. Upper Middle Mandibular joint (ST07, the red dot); 5. Temple area (EX-HN5, the green dot); 6. Solar Plexus (CV15, not shown in the photo).
Abbreviation: ST=Stomach Meridian; GV=Governing Vessel Meridian; EX-HN=Extra Head & Neck Point; CV=Conception Meridian.

The face is rich with glands, plexus of nerve bundles, and nerve branches that are directly connected with the central nervous system in the brain and the vagus nerves in the stomach.
Scenario 1
Straight headbutt to the Cheek Bone-Orifice (ST03) not only shocks the nerves in the brain but also the sensory receptors in the stomach, causing nausea and disorientation.

Straight headbutt to the Cheek Bone (ST03, the Great Bone-Orifice)
Scenario 2
A headbutt to the nose (GV25) shocks the brain through the external nasal nerve, the branch of the trigeminal nerve, causing excruciating pain, and can seriously damage the assailant’s nose and mouth.

A headbutt to the nose (GV25) drastically intensifies the sensory signals to the brain via the nasal nerve, causing pain and confusion.
Scenario 3
Rather than striking a concussive blow, use your head to push on the Eyebrow (EX-HN4) and force the opponent to move away from you. Or snap with the strong side of your forehead on the ridge at the top of the eye socket.
Headbutt to the Eyebrow (EX-HN4) can cause cuts that will bleed profusely, obstructing the assailant’s vision.
Scenario 4
The mandibular joint is a key facial structure for chewing and speaking. It also plays a critical role in counterbalancing the head and neck. Striking the upper inner mandibular joint (ST07) not only causes pain that spreads over the head and face (there is a huge membrane called the Parotid gland surrounded by three branches of facial nerves underneath) but also diminishes the sense of balance.

Headbutt to the upper inner mandibular joint (ST07) causes pain and numbness and imbalance.
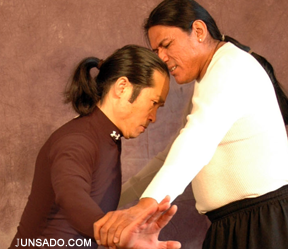
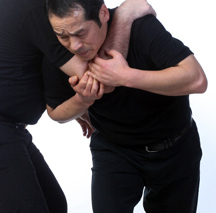
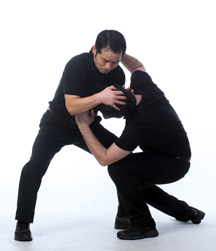
Scenario 5
While pressing the middle of the forearm (LI11, Pool at the Bend) with your thumb and striking the groin with your left hammer fist, deliver a headbutt to the Temple area (GB4-8, the V-shaped area packed with vital targets) to shock the opponent into releasing his grip. (Abbreviation: LI=Large Intestine Meridian)

The temple area is rich with nerves (GB4-8). When you strike the opponent’s groin with your hammer fist and bend your torso sharply forward, his head naturally drops forward. To avoid striking his nose on the back of your head, he will turn his head to the side, and you can strike his temple with the rear top corner of your head.
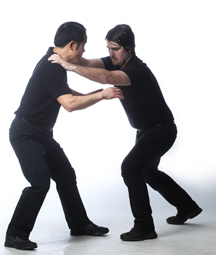
Scenario 6
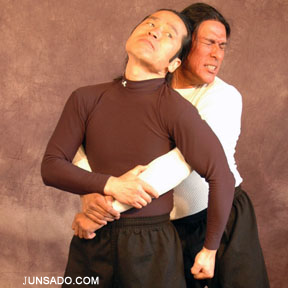
When there is a sudden totally unexpected change in the environment, we have a tendency to inhale. When the opponent grabs your wrist, relax your muscles initially, then suddenly rotate your wrists inward and open the gap. As he inhales, strike the solar plexus (CV15) with your head. A well placed headbutt can stop his breathing.

A headbutt strike to the solar plexus (CV15) or the sternum (CV17) is a classic close-quarter martial skill.
Bottom Line
The head is a vulnerable target and thus a headbutt is dangerous to use in fighting. However, due to the hardness of the skull, when applied correctly, a headbutt is a powerful technique that may stop an aggressive opponent in a desperate situation. The key is to close the distance and to use the hard part of the forehead to strike a soft target such as the nose or temple.
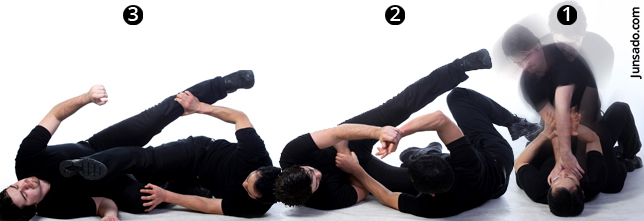
 Developed based on the popular Junsado videos and DVDS, along with valuable feedback from the Junsado practitioners from all over the world, this is the first book in the Junsado Essentials Series. Over 50 standing and ground combat scenarios take you through a wide range of possible attack and defense situations to improve your fighter’s instinct. In addition to demonstrating a practical defensive strategy, each scenario illustrates a key Junsado principle in action, building your ability to apply fighting principles across a wide range of situations.
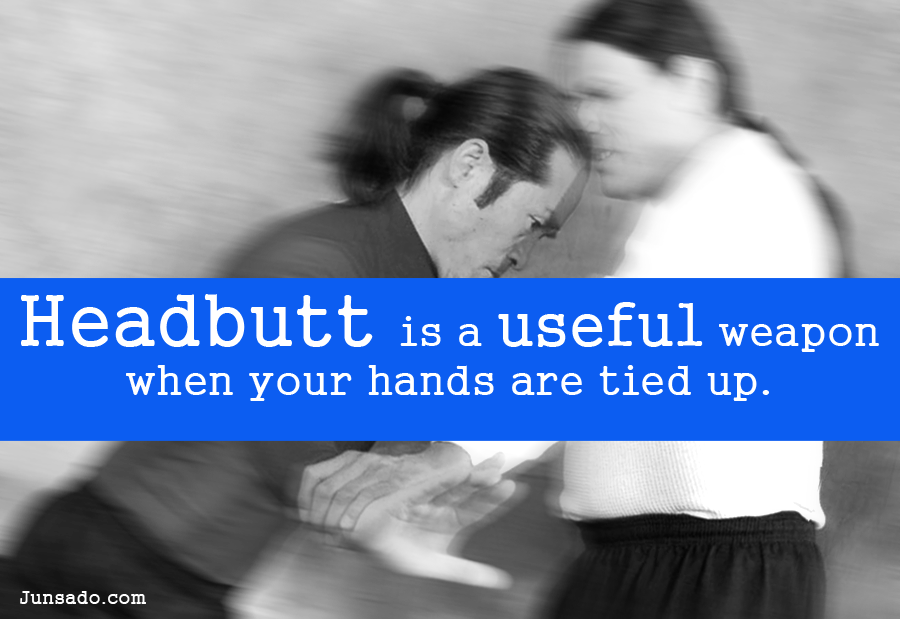


You must be logged in to post a comment.